
Mechanical keyboards are beloved by tech enthusiasts, gamers, and professionals for their tactile response, customizable features, and long-term durability. Among the various layouts available, the 65% keyboard has become a popular choice thanks to its compact form and functional design. But at the heart of any mechanical keyboard is one critical component — the PCB, or printed circuit board.
Understanding the functionality and structure of a 65 keyboard PCB is essential if you’re building a custom board or choosing a prebuilt option. In this guide, we’ll explore what a 65 keyboard PCB is, how to choose the right one, and why advanced PCB design and manufacturing matter — especially when quality, performance, and customization are on the line.
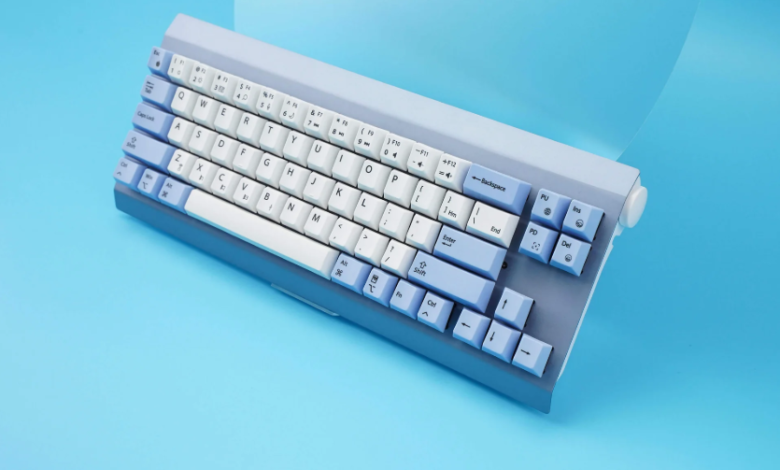
What Is a 65 Keyboard PCB?
A 65% keyboard is a streamlined layout that typically includes 67 to 68 keys. It retains the alphanumeric section and arrow keys but omits the function row and number pad found on full-size keyboards. This format is popular for users who want a compact board without sacrificing navigation functionality.
A 65 keyboard PCB is the internal circuit board that allows each key to register input when pressed. It connects switches to a controller using conductive traces, ensuring each keystroke is reliably processed by the computer. The PCB determines how the switches are mounted, what firmware can be loaded, and whether features like RGB lighting or hot-swappable sockets are supported.
See also: How to Choose the Best Auto Body Shop for Your Car Repairs
Key Features to Look for in a 65 Keyboard PCB
When selecting a 65% PCB, consider the following features to ensure you’re getting optimal performance and flexibility:
1. Hot-Swappable Sockets
Many modern keyboard PCBs come with hot-swap functionality, allowing you to change switches without soldering. This is ideal for users who enjoy trying different switch types or want to avoid soldering altogether.
2. QMK and VIA Support
Advanced users may want to program their keyboards for macros or key remapping. PCBs compatible with QMK (Quantum Mechanical Keyboard) or VIA firmware offer powerful customization options that go beyond basic layouts.
3. RGB Lighting
Integrated RGB lighting has become a staple for gaming setups and aesthetic builds. Check whether the PCB supports per-key RGB or underglow lighting and if it is customizable via software.
4. Mounting Style and Layout Compatibility
Not all 65% cases are created equal. Make sure your PCB matches the mounting style (tray mount, top mount, gasket mount) and layout (split spacebar, ISO vs ANSI) of your keyboard case and plate.
5. Connectivity
Most PCBs connect via USB-C, which is now the standard for keyboards. Some may offer wireless connectivity options or support multiple layers of onboard memory.
Technical Considerations in PCB Design
While most end users only interact with the finished keyboard, engineers and developers know that PCB design is where everything begins. A high-quality keyboard PCB must balance electrical integrity, durability, and manufacturability.
Trace Routing and Signal Integrity
Each key on the keyboard sends a signal to the controller. In densely packed PCBs like those in a 65% layout, careful routing is needed to prevent signal interference and crosstalk. The thinner the traces and the more layers involved, the more complex the design becomes.
Copper Weight and Layer Count
Most consumer PCBs use 1 oz copper, but heavier copper can be used for improved durability and current handling. Multilayer PCBs are also common, allowing engineers to isolate power and ground planes to reduce electromagnetic interference.
Solder Mask and Silkscreen
The solder mask color (often green, black, or white) is primarily aesthetic, but high-quality masks also help with manufacturing accuracy. Silkscreens are used to print component labels and branding, aiding in assembly and troubleshooting.
Advanced PCB Manufacturing for Keyboards
To ensure reliability, keyboard PCBs should be fabricated and assembled using precise and modern techniques. High-quality manufacturers like globalwellpcba.com specialize in custom and complex circuit boards, offering services such as:
- Rigid-Flex PCB solutions: Ideal for devices with tight space requirements or moving parts
- High Frequency PCBs: Important for components that handle USB communication or wireless signals
- Surface Mount Technology (SMT): Enables compact layouts with precise component placement
- Quality Assurance: Including automated optical inspection (AOI), functional testing, and X-ray for hidden solder joints
This level of technical sophistication is crucial when building a PCB that must endure years of keystrokes without failure.
Industry Applications Beyond Keyboards
While this article focuses on 65% keyboards, it’s worth noting that PCB design and manufacturing principles apply across industries. Rigid-Flex and High Frequency PCBs are vital in:
- Telecommunications – routers, switches, and signal processors
- Robotics – control modules and motion sensors
- Automotive – advanced driver-assistance systems (ADAS) and infotainment
- Consumer Electronics – from smartphones to game controllers
The same technologies that power a keyboard’s responsiveness also drive innovation in mission-critical systems. As demand grows for smart devices and miniaturization, PCB manufacturers must keep up with increasingly complex specifications.
How to Build a Custom 65 Keyboard (Quick Guide)
For enthusiasts who want to build their own mechanical keyboard, here’s a simplified step-by-step guide:
- Choose a Case – Match your preferred material (aluminum, acrylic, plastic) with your layout.
- Select a Plate – Choose between aluminum, brass, FR4, or polycarbonate based on feel and sound.
- Pick a PCB – Make sure it’s compatible with your case and layout. Look for hot-swap, QMK/VIA support, and RGB if needed.
- Choose Switches – Linear, tactile, or clicky — it’s up to you.
- Add Keycaps – Pick a profile and material you like (e.g., PBT, ABS).
- Assemble the Board – Install stabilizers, mount switches, connect the PCB, and close the case.
- Flash Firmware – Customize your layout and keymaps using VIA or QMK.
This DIY approach gives you control over every detail, from typing feel to RGB lighting patterns.
Conclusion
Choosing the right 65 keyboard PCB isn’t just about layout or lighting — it’s about ensuring every keypress registers with accuracy and speed. Whether you’re a keyboard builder, gamer, or product developer, understanding the fundamentals of PCB design helps you make smarter choices. Consider key features like hot-swap support, QMK compatibility, and RGB integration, but also look beneath the surface at copper weight, routing, and manufacturing quality.
For those looking to source reliable, custom-designed PCBs — not just for keyboards but also for applications in telecommunications, robotics, and more — Global Well PCBA offers a technical edge with advanced fabrication capabilities and deep expertise in high-performance PCB solutions.


